“Blank walls are like empty canvases just waiting to tell your story.”
I’ll never forget the first time I walked into my new apartment—white walls everywhere. It felt cold, sterile, and honestly, kind of sad. I couldn’t paint. I couldn’t drill. I was stuck with walls that screamed, “I’m temporary.”
That’s when I discovered the power of Simple DIY wall art Ideas. It changed everything.
And now? My walls are filled with pieces that feel personal, stylish, and 100% me—without breaking my lease or my bank account. If you’re a renter, a budget decorator, or just someone who wants to add personality to your place, this is for you.
Let’s dive into 21 renter-friendly DIY wall art ideas that are easy, budget-conscious, and totally beginner-friendly.
Why DIY Wall Art? (And Why It’s Better Than Store-Bought)
Here’s the deal: custom wall decor can cost hundreds. And generic store art? Meh. DIY wall art is:
- Budget-friendly – Most of these projects cost under $20.
- Personalized – You get to choose the colors, themes, and textures.
- Renter-approved – No need to drill or repaint.
Pro Tip: Not “crafty”? Don’t worry. Most of these are no-skill-required. Seriously.
What You’ll Need to Get Started (A Renter-Friendly DIY Kit)
Here’s your quick-start kit to make nearly every project in this post:
- Canvas panels or foam board
- Acrylic paint set
- Washi tape or painter’s tape
- Command picture-hanging strips
- Mod Podge glue or spray adhesive
- Printable art (check out our free downloads below 👇)
READ ALSO: 25 DIY Home Decor Projects That Instantly Make Your Home Look Expensive (On a Budget)
21 DIY Wall Art Ideas That’ll Elevate Any Room
Let’s get creative. Each idea includes materials, how-to basics, and why it works for renters. Whether you live in a small apartment or a cozy studio, you can enhance your living space with these budget-friendly DIY wall art ideas. No expensive artwork or complicated installation is needed – just creativity and some supplies you may already have!
Let’s dive into these 21 stunning DIY wall art projects that will instantly transform your space and liven up your walls.
1. Abstract Canvas Painting: Embrace Your Inner Artist
Why It Works: Abstract art is perfect for beginners, as it’s all about freedom and experimentation.
What You Need: A blank canvas, acrylic paints, sponge brushes.
How to Do It: Pour different colors of paint directly onto the canvas, then use the sponge brushes to swirl and mix. Layer the colors until you achieve your desired effect. Allow it to dry and hang it up. This project is quick, easy, and makes a bold statement.
Pro Tip: Don’t overthink it! The beauty of abstract art is that there’s no “wrong” way to do it. Let your creativity flow!
2. Washi Tape Geometric Wall: No Nails, No Problem

Why It Works: A stylish and damage-free way to add some structure to your walls.
What You Need: Washi tape (choose a few colors or patterns that match your room’s vibe).
How to Do It: Use washi tape to create geometric patterns like triangles, stripes, or grids on your walls. The best part? It’s easily removable and won’t damage your walls, making it perfect for renters.
Pro Tip: Play around with different angles and overlapping lines for a more dynamic, modern look.
3. Framed Fabric Panels: Add Texture Without Wallpaper
Why It Works: A great way to incorporate fabric into your decor without the mess of wallpaper.
What You Need: Fabric swatches, thrifted frames, scissors.
How to Do It: Cut fabric into pieces that fit your frames and iron out any wrinkles. Once framed, arrange the fabric panels on your wall. The fabric’s texture will add depth and warmth to the room.
Pro Tip: Mix different types of fabric (floral, striped, textured) to create an eclectic, layered look.
4. Printable Typography Quotes: Instant Personality
Why It Works: A quick and inexpensive way to add inspiring words or motivational quotes to your space.
What You Need: Printer, frame, free downloadable templates (there are tons of free quote templates online!).
How to Do It: Find a typography quote you love, print it out, and frame it. You can also use free templates to create your own designs, playing with fonts and colors to match your decor.
Pro Tip: Use a clean, modern font for a minimalist look, or go bold with hand-lettering for a more personal touch.
5. Gallery Wall with Personal Photos: Make It Meaningful
Why It Works: You can’t go wrong with photos of your favorite memories, plus it’s super customizable.
What You Need: Photo prints, frames, a layout plan.
How to Do It: Print out your favorite photos (mix black & white with color for depth), and frame them. Plan your layout on the floor first to see how the photos look together, then hang them on the wall.
Pro Tip: Use matching frames for a more cohesive look, or mix and match different styles for a more dynamic, eclectic gallery.
6. Macrame Wall Hanging: Boho Vibes with Texture
Why It Works: Adds a rustic, cozy texture to your walls and fits perfectly into boho or minimalist spaces.
What You Need: Macrame cord, wooden dowel.
How to Do It: Cut the cord into lengths, then tie knots in patterns you like—square knots, lark’s head knots, or other macrame techniques. Hang it from the wooden dowel for a statement piece.
Pro Tip: If you’re a beginner, start with a simple design, then get more intricate as you build confidence.
7. Stenciled Wall Panels: Luxury Look Without the Price Tag
Why It Works: You get the high-end look of wallpaper or custom panels, but for a fraction of the cost.
What You Need: Stencil, paint, foam roller, painter’s tape.
How to Do It: Apply painter’s tape to section off the area you want to stencil. Use a foam roller to apply paint over the stencil and reveal a crisp, professional design.
Pro Tip: Choose stencils with intricate patterns for a high-end look. Bold geometric shapes or floral patterns work beautifully!
8. Framed Wallpaper Samples: Free Design, Major Impact
Why It Works: Wallpaper samples are often free, and they give you a designer look without the hefty price tag.
What You Need: Wallpaper samples (grab them for free at stores like Lowe’s or online at Spoonflower), frames.
How to Do It: Select a few wallpaper samples that match your aesthetic. Cut them to fit your frames and hang them up for an instant, chic transformation.
Pro Tip: Mix and match patterns for an eclectic gallery wall, or stick with similar styles for a more uniform look.
9. Shadow Box with Memorabilia: Preserve Your Memories in Style
Why It Works: A beautiful and personal way to display keepsakes and mementos.
What You Need: Shadow box, memorabilia like concert tickets, postcards, or travel trinkets, glue.
How to Do It: Arrange your memorabilia inside the shadow box and secure it with glue. You can also add a background, like patterned paper or fabric, to give it extra flair.
Pro Tip: For a uniform look, choose items in a specific color palette. For example, arrange your tickets and postcards by color or theme.
10. String Art with Push Pins: Creative and Fun
Why It Works: A customizable design that’s simple to make but looks complex.
What You Need: Corkboard, embroidery thread, push pins.
How to Do It: Pin a design onto your corkboard, then use embroidery thread to trace the outline of the design. The result is a bold, textured piece of art with plenty of visual impact.
Pro Tip: Choose a minimalist design, such as a heart or star, for a simple, modern look, or get creative with more intricate patterns.
11. Canvas Quote with Stencils: Personalize Your Walls with Words
Why It Works: Stencils make it easy to create perfectly shaped lettering, and you can personalize your space with your favorite quotes or sayings.
What You Need: Blank canvas, stencils, acrylic paint, sponge brushes.
How to Do It: Use stencils to paint your favorite quote or phrase on a blank canvas. You can experiment with different fonts and colors to match your decor. Once the paint is dry, hang it up on your wall for an instant personalized touch.
Pro Tip: Use contrasting colors to make the text pop, or keep it simple with monochromatic tones for a sleek, minimalist look.
12. Paint Chip Mosaic: Colorful, Creative, and Inexpensive
Why It Works: Paint chips are free, and they offer endless color combinations to create a stunning mosaic wall art piece.
What You Need: Paint chips, scissors, glue, canvas or wooden board.
How to Do It: Cut paint chips into small squares or other shapes. Arrange them in a pattern or mosaic on your canvas or board, and glue them down. The result will be a bold and colorful piece that adds vibrancy to your space.
Pro Tip: Stick to a color scheme for a cohesive look, or go wild with a rainbow of hues to create a fun and lively design.
13. Hanging Clipboard Gallery: Easy to Switch Up Your Art
Why It Works: A clipboard gallery allows you to easily swap out art, photos, or quotes for a rotating display.
What You Need: Clipboards, artwork or photos, nails or hooks.
How to Do It: Hang several clipboards on your wall, and clip your favorite prints, photos, or even personal notes. The beauty of this project is its versatility—switch out the artwork whenever you feel like it for a fresh new look.
Pro Tip: For a clean and modern design, paint your clipboards the same color as your walls. For a more rustic vibe, leave them natural or stain them.
14. Dried Flower Shadowbox: Nature-Inspired Art
Why It Works: Dried flowers bring a touch of nature indoors, creating an elegant, timeless look.
What You Need: Shadow box, dried flowers, glue or double-sided tape, optional background paper.
How to Do It: Arrange dried flowers in a shadow box, securing them with glue or tape. You can add a simple background, such as vintage newspaper clippings or textured paper, to complement the flowers.
Pro Tip: Choose flowers with different shapes and colors for a dynamic display. Consider using flowers that hold sentimental value, like those from a special occasion.
15. Wall Decals from Etsy: Quick, Removable, and Stylish
Why It Works: Wall decals offer an easy and temporary way to add design elements to your walls, especially for renters.
What You Need: Wall decals (Etsy has tons of unique, customizable options), measuring tape.
How to Do It: Order wall decals that match your room’s aesthetic, then follow the instructions to apply them to your wall. The decals are easy to remove without damaging the wall, making them perfect for renters or anyone looking for a non-permanent option.
Pro Tip: Opt for decals that reflect your personality—whether it’s a motivational quote, nature-inspired designs, or geometric shapes—to make your space feel like your own.
16. Photo Transfer Art: Transform Your Photos into Fine Art
Why It Works: Turn your personal photos into custom art pieces with a simple photo transfer technique.
What You Need: Printed photos, Mod Podge, canvas or wood surface, sponge or brush.
How to Do It: Coat your photo with Mod Podge and press it face-down onto a canvas or wooden surface. Let it sit for several hours, then gently rub the paper away with a wet sponge. The photo will remain on the surface, creating a cool, vintage effect.
Pro Tip: Use black and white photos for a timeless look, or try this technique with colorful images for a more modern, vibrant twist.
17. Framed Sheet Music: Add Elegance with Music Notes
Why It Works: If you’re a music lover or have a musical background, framed sheet music is a unique and sentimental way to decorate.
What You Need: Sheet music (printed or original), frames, scissors.
How to Do It: Find a piece of sheet music from a song you love or that holds personal significance. Trim it to fit your frame, then hang it up as a stylish and meaningful art piece.
Pro Tip: Mix and match different pieces of sheet music for a gallery wall, or pair the framed music with other vintage decor items to create an eclectic, artistic vibe.
18. Vintage Postcards Gallery: Travel Back in Time
Why It Works: Vintage postcards offer a glimpse into the past and tell stories of far-off places, making them a great conversation starter.
What You Need: Vintage postcards, frames, scissors, nails or hooks.
How to Do It: Find some vintage postcards from your travels or online, then frame them. Arrange them in a grid or gallery style on your wall. These postcards add charm and nostalgia to any room.
Pro Tip: Look for postcards with colorful designs or scenic views for an added visual punch. A vintage map or globe would complement the postcards perfectly.
19. Mini Art Canvas Series: Create a Bold Statement with a Collection
Why It Works: Small canvases grouped together can create a striking focal point on your wall, especially when each piece has its own unique design.
What You Need: Mini canvases, acrylic paint, brushes, or stencils.
How to Do It: Create a series of mini paintings on small canvases, each with its own design or color scheme. Arrange the canvases on your wall in a grid or clustered formation for a modern, artistic look.
Pro Tip: Use a single color palette to tie the pieces together, or choose different styles (geometric, abstract, nature-inspired) for a more eclectic, fun vibe.
20. Corkboard Art: Functional and Decorative
Why It Works: A corkboard allows you to display art, photos, and notes, making it both functional and decorative.
What You Need: Corkboard, pins, artwork or photos, fabric or paper for a background.
How to Do It: Cover a corkboard with fabric or patterned paper for a decorative backdrop, then use pins to display your artwork, photos, or even important reminders.
Pro Tip: Decorate the edges of the corkboard with washi tape or paint to match your room’s theme for a more polished look.
21. Hanging Plants with Art: Bring the Outdoors In
Why It Works: Combining plants with art creates a natural, calming atmosphere that’s both stylish and vibrant.
What You Need: Small potted plants, plant hangers, macrame cord (optional), wall hooks.
How to Do It: Install small hooks or use macrame plant hangers to display your favorite plants on the wall. The greenery adds color and texture, while the art provides a balanced visual.
Pro Tip: Pair plants with art that complements the natural aesthetic—think botanical prints or nature-inspired paintings.
With these 21 DIY wall art ideas, you have plenty of options to add your personal touch to any room. Whether you’re creating a gallery wall filled with memories, experimenting with colorful designs, or displaying sentimental keepsakes, these budget-friendly projects allow you to express your style without spending a fortune.
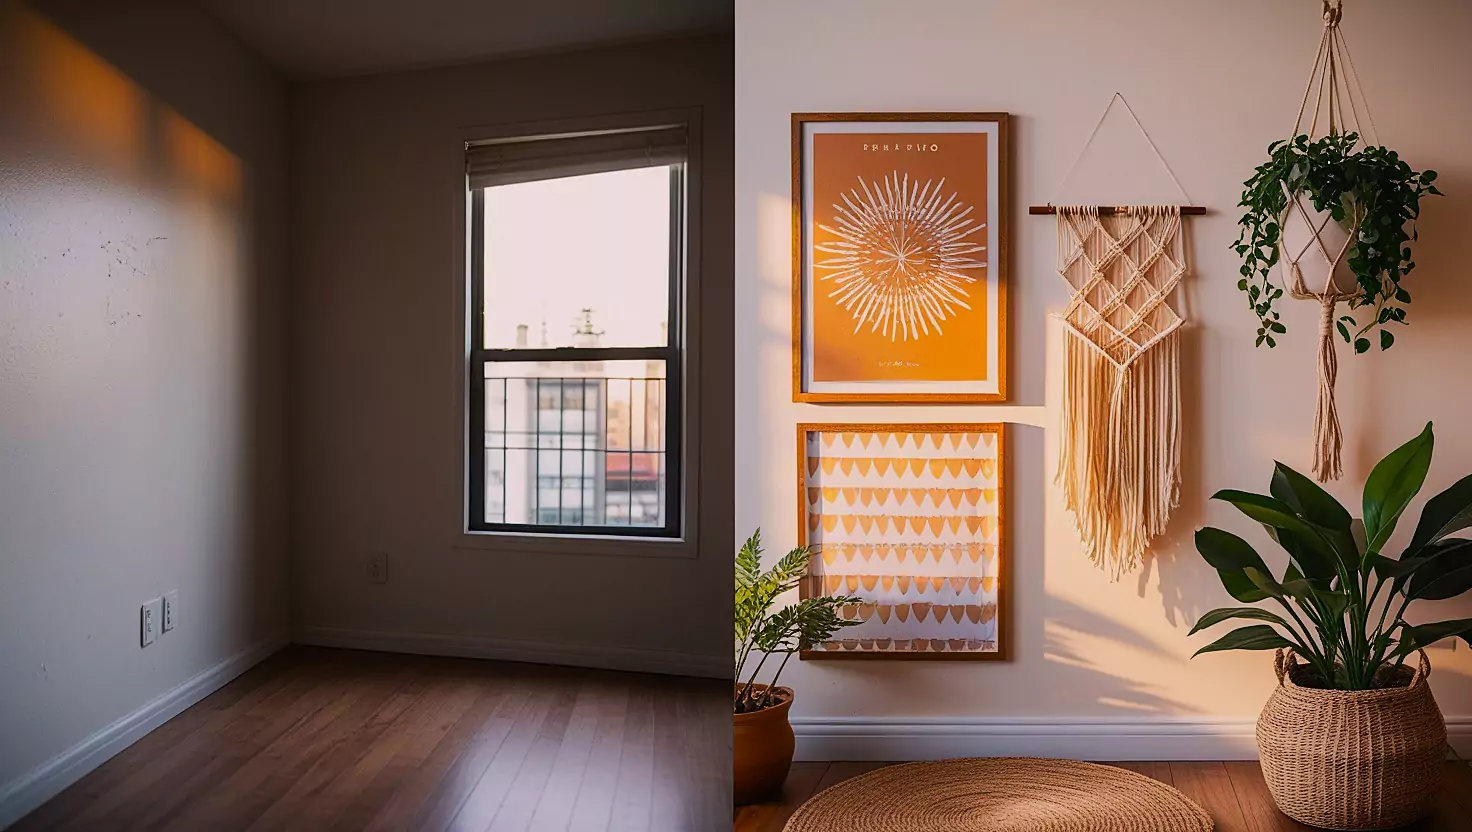
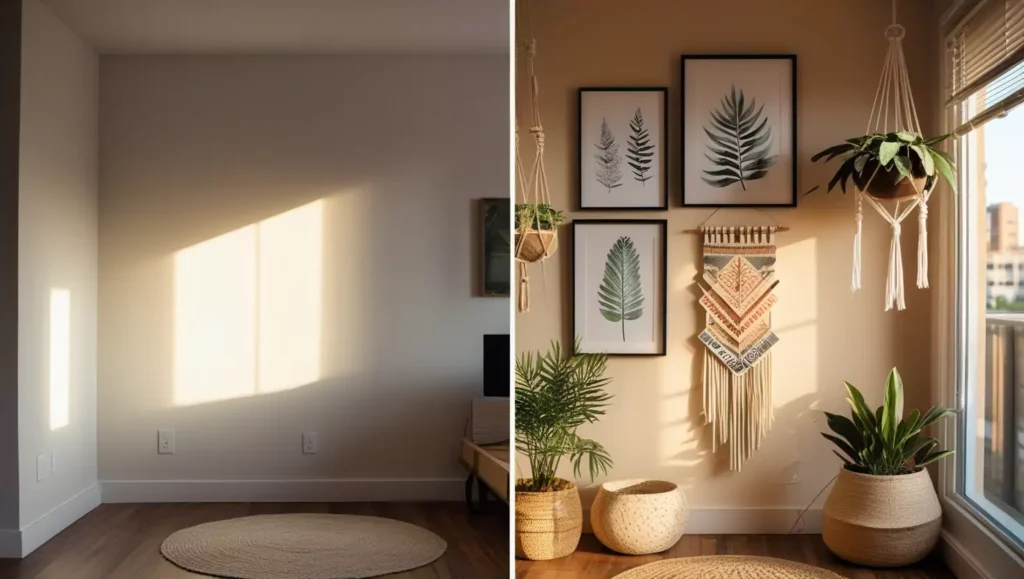
Real-Life Makeovers: From Blank Walls to Wow

Tips to Make DIY Wall Art Look Professional
- Stick to a color palette – 2–3 main hues keep it cohesive.
- Measure spacing – Use painter’s tape to lay out before hanging.
- Vary texture and scale – Mix soft (macrame) with bold (typography).
- Use picture-hanging strips – Damage-free and renter-safe.
Common Mistakes to Avoid (So Yours Doesn’t Look Like a Pinterest Fail)
- Using low-quality or flimsy materials
- Ignoring layout balance or alignment
- Hanging art too high or too low (eye level is ideal)
- Skipping wall prep — wipe down before sticking anything
Tweetable Tip: “DIY wall art rule #1: Always test layout with tape before hanging! #RentersLife”
Final Touches: Lighting, Hanging & Styling
- Use LED wall spotlights or clip-on lights to highlight your work
- Layer wall art with floating shelves for depth
- Add a plant nearby for instant freshness
Style Tip: Odd-numbered groupings (3, 5, 7) are more visually appealing.
FAQ
Q. How to store clothes in a small apartment?
Use under-bed bins, vertical shelves, and slim hangers to save space.
Q. How to add storage to a small living room?
Opt for dual-purpose furniture like ottomans with storage or floating shelves.
Q. How to organize when you have no space?
Maximize vertical space, declutter often, and use door/back-of-closet organizers.
Q. How to maximize a small storage unit?
Label everything, use clear bins, stack vertically, and create aisles for access.
Conclusion
Small spaces aren’t limitations—they’re invitations to get creative. With a few renter-friendly tricks and a little DIY spirit, you can turn any wall into a canvas and every corner into a stylish, functional vibe. You’ve got this!
Ready to Create Your First Piece?
DIY wall art isn’t about perfection—it’s about expression. Whether you’re filling your first apartment or revamping your bedroom, you can create a space you love.
Start with one idea. See how it feels. And remember, every piece tells your story.
🎯 Which project will you try first? Drop a comment below—I’d love to hear!